When it comes to drain testing, there are two primary methods: air testing and water testing. These are often accompanied by other techniques like smoke testing and mandrel testing. Each method serves to confirm that the newly installed plumbing system is free from leaks and meets the required standards. This is crucial since every segment of a plumbing or underground pipe system plays a vital role in ensuring the proper functioning of the entire system. Conducting multiple drain tests helps identify any potential leaks in a recently installed system. Proper drain testing is essential to ensure that the final project complies with all relevant UK regulations.
Typically, you'll perform a drain test before the official inspection and then repeat the process in the presence of a building control officer.
Things to Consider Before Carrying Out Drain Tests (Drain Testing Procedure & Building Control)
Before proceeding with a drain test, all pipelines should be thoroughly inspected for any initial impairments or leaks. If you're dealing with jointed systems, ensure they've completely drained for at least two days before beginning any tests to avoid confusion over potential issues.
Additionally, a building control officer must be present during the test. However, it's advisable to run the system beforehand to check for any immediate errors while the officer observes the test.
What is Smoke Testing?
Smoke testing isn't considered a formal assessment of a drainage system's water-tightness. However, it can be useful for identifying leaks and faults in uPVC pipes that might not show up during water or air tests. Always consult with manufacturers before conducting this test, as it could damage certain types of pipes.
What is Mandrel Testing?
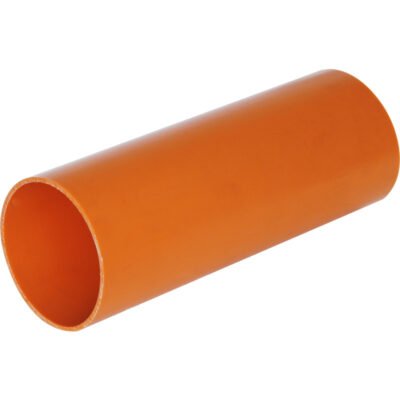
Mandrel testing evaluates the quality of an installation. It involves inserting a small object, slightly smaller than the pipe's diameter, into the pipe to ensure consistent diameter throughout. For instance, if the pipe is 150mm, you'd use a 135mm mandrel. Mandrels are typically cylindrical objects.
How Does a Drainage Air Test Work?
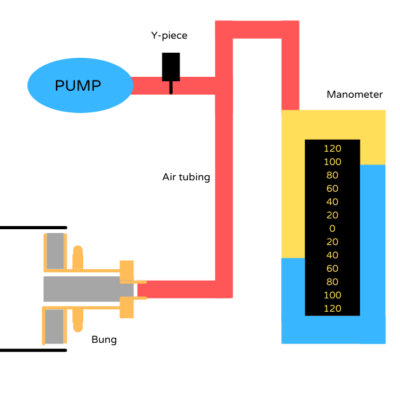
An air test is a quick and efficient way to check both individual pipes and drain runs. This is achieved by blocking a specific part of the drain with two separate gauges, setting the pressure to 110mm head for five minutes, and then adjusting it to 100mm head for another five minutes. Any changes in pressure are measured. While effective, this method can't be used on all types of drains and systems, as it requires the drain to be sealed at both ends and is highly sensitive to temperature changes. Even a slight decrease in temperature inside the pipe can cause the test to fail.
Drain Testing Procedure for an Air Test
Begin by fitting a bung at the start of the pipe run with the appropriate nipple cap to connect it to the hose leading to the manometer. Ensure your manometer has been partially filled with water before this step.
Use a hand pump to increase the pressure until the manometer reads between 125-150mm. Afterward, let the equipment sit for 10 minutes to stabilize before reducing the manometer's pressure to 100mm.
Monitor the manometer for five minutes, ensuring the pressure does not drop below 75mm. This indicates a successful test. If it does drop below 75mm, inspect for leaks and other signs of failure. Address any issues before repeating the test. If it still fails, proceed with a water test.
How Does the Drainage Water Test Work?
Water testing, also known as water drop testing, is a method requiring less pressure but can take up to 2 hours to set up. It works by plugging the ends of the system, filling it with water, and observing the water levels at a manhole or access point. No additional pressure should be applied during the water test. The water level should be limited to 1.5 meters from the lowest invert level of the drain being tested. One advantage of this method is that it allows testing the entire system at once, benefiting everyone involved.
Drain Testing Procedure for a Water Test
Two sets of rules apply depending on the pipe diameter. For pipes ranging from 100-400mm, follow BS8301 guidelines, with a maximum head of 1500mm at the high end and 400mm at the low end. For pipes between 400-750mm, follow BS8005 guidelines, with a maximum head of 1200mm at the high end and 6000mm at the low end.
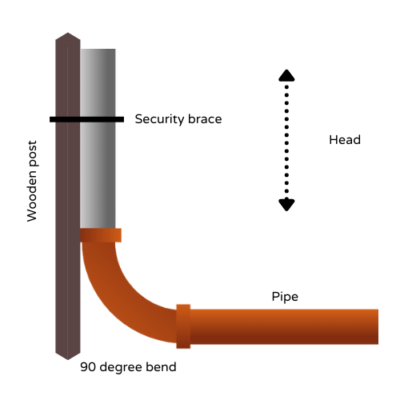
Start by plugging the lower end and all open branches. Add a 90-degree bend to the top part of the run along with a vertical pipe of the same diameter, which should be securely tied to a fixed object like a wooden post.
Add water to the required head level in the vertical pipe based on the chosen guidelines (BS8301 or BS8005). Let the water stand for two hours, then refill to the specified level.
Monitor the process for half an hour, keeping the water head filled as necessary, and record the amount of water added. At the end of the half-hour, calculate the maximum permissible loss, which is one liter of water per hour for every meter of pipeline and inside pipe diameter. For example, for a 100-meter pipe with a 200mm diameter, the loss should not exceed 2 liters per hour.
Making Repairs
It's not unusual to need repairs after a drainage test. Often, this involves replacing a faulty section of pipe or redoing a joint. However, if no obvious fault is found, it might require disassembling the entire system and testing each section individually using an air test. After identifying the fault, rerun the tests to ensure everything functions properly. This might involve replacing a section of pipe or rejoining and sealing parts of the system.
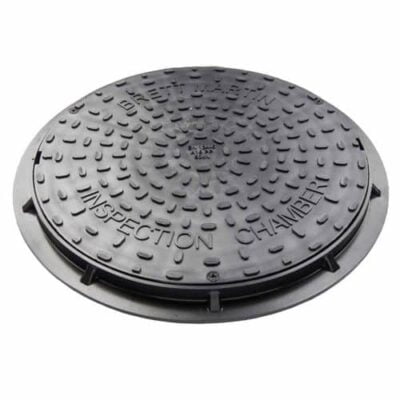
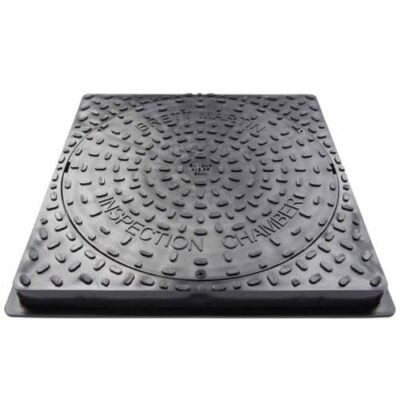
Manhole covers and inspection chambers often have leaking joints, which can usually be fixed by rejoining and resealing. However, if the issue lies with the base and concrete sealing of the pipe, and epoxy mortar doesn't resolve it, the only option is a complete rebuild, which is not ideal but necessary according to regulations. Always retest after attempting to fix any issues within the system.
How to Water Test a Manhole and Inspection Chamber
The process is similar to the regular water test. First, plug all open-ended outlets and then fill the manhole chamber with 300mm of water.
Wait at least an hour but no more than two, then visually monitor the water inside the chamber for half an hour. A water loss of less than 25mm over 10 minutes is generally considered a pass. If uncertain, use the same calculations as with the pipes to determine this.
What Are Classed as Acceptable Leakage Rates for the Drainage Water Test? (Litres in 10 Minutes)
For an 110mm diameter pipe, 0.2l per 5-10m, 0.4l per 10-20m, 0.6l per 20-30m
For a 160mm diameter pipe, 0.3l per 5-10m, 0.6l per 10-20m, 0.9l per 20-30m
For a 200mm diameter pipe, 0.4l per 5-10m, 0.8l per 10-20m, 1.3l per 20-30m
For a 225mm diameter pipe, 0.5l per 5-10m, 0.9l per 10-20m, 1.4l per 20-30m
What Happens with Drains Less Than Five Meters Long?
If your drainage system is less than five meters, use common sense to evaluate whether the leakage is acceptable. A good rule of thumb is that if there is visible damage at the test site, it's likely you're losing more water than expected. Generally, an amount less than 25mm in ten minutes is not considered a significant concern.
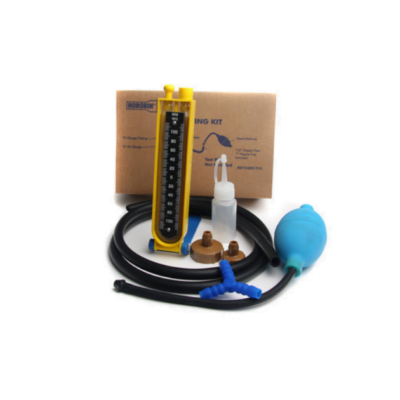
What’s in a Drain Testing Kit?
At EasyMerchant, we offer both air testing kits and drain testing kits tailored to your project's needs. The drain testing kit includes the essentials required for testing a drainage setup:
- Air tubing
- ‘U’ air gauge (manometer)
- Y-piece
- 4†plugs/bungs and a ½†brass nipple
- Hand bellow
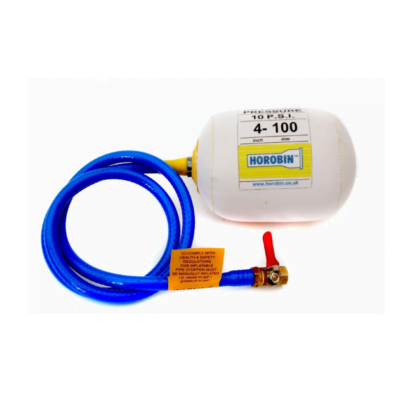
Drain Testing Bags
Drain testing bags are versatile tools used across various industries such as sewage, petrochemicals, food processing, and mining. Their adaptability makes them ideal for testing areas with a smaller diameter than the test pipe. Smaller sizes often come equipped with Schrader valves or brass air traps, while larger ones feature ball valves for inflating via a compressor. They can also be fitted with a pressure gauge to prevent over-inflation.
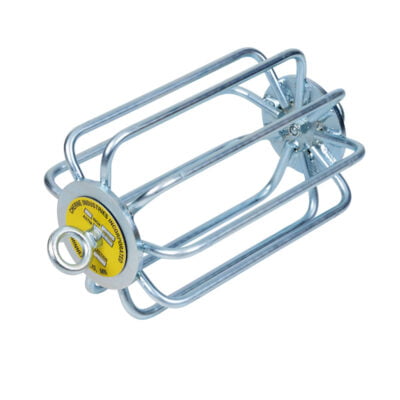
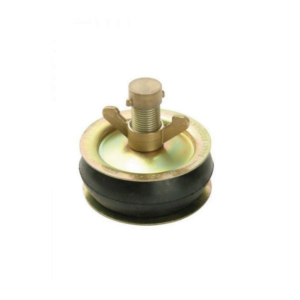
Drain Testing Bungs
To correctly test any pipework using either the air test or water test, expanding bungs are essential and among the most critical pieces of equipment. The drain testing bungs themselves have a metal outer shell that compresses the rubber inner core (which expands to block the pipe), with a hollow mid-section and a nut that adjusts the compression of the device. If you can't connect the bung to a manometer, you can fit a nipple to the end or use an end cap for a secure seal.
Bung sizes vary depending on the pipe diameter needed for the job. For a 110mm drainage pipe, a 100mm (4-inch) bung is required. For a 225mm pipe, a 150mm (6-inch) bung is needed. At least two bungs will be required depending on the property and pipeline being tested, one for each end.
Ensure there are no issues or dirt preventing the installation and function of the bung before attempting to fit it, as any grit or dirt within the seal could lead to leaks and test failure.
When applying the rubber bung, open it out to make the rubber section's diameter smaller before inserting it into the pipe. Tighten it afterward to expand and create a strong seal pressing against the inner pipe, forming a barrier that ensures accurate pressure readings from the test drain.
At EasyMerchant, we stock the equipment needed for drain testing and have extensive knowledge of the process. Feel free to reach out if you have any questions.

Shop Drain Testing:
Drain Testing Bungs

Drain Testing Kit
We provide different types of the freestanding bathtubs, and acrylic construction to ensure durability.
Yunspire has rich exprience in manufacturing Faucets & Bathroom Accessories of 20 years in Guangdong, China.
Our manufacturing process advanced technology with superior materials, rigorous testing, and comprehensive quality control, all to ensure your complete and total satisfaction. If you have any questions, please contact with us directly.
Bathroom Freestanding bathtub, Bath Freestanding Bathtub, Bathroom Acrylic bathtub
WPWF (JIANGMEN) Sanitary Ware Company Co.,Ltd. , https://www.yunspirefaucet.com