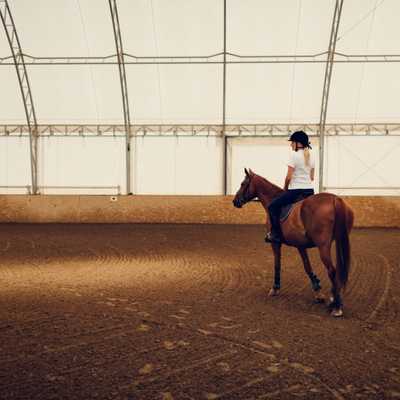
Where to Build Your Arena
When planning the location for your horse arena, it's crucial to consider several key factors before diving into the actual construction. You might already have some ideas, but there are additional aspects you should think about. In this guide, we’ll explore essential considerations for building your riding arena and touch on the fundamental steps involved in the construction process.
Ensuring Good Access to the Site
Lack of accessibility to your planned arena location can lead to multiple issues. First, suppliers or couriers might not be able to deliver materials directly to the site, increasing haulage costs. Additionally, large machinery like diggers and lorries are often necessary during construction, and poor access will force builders to use smaller vehicles, prolonging the project timeline and raising costs further. Therefore, we strongly recommend choosing a location with enough space that allows direct access for large vehicles and everyone involved.
However, if poor access is unavoidable, you might consider collaborating with a local farmer. They may agree to drop off materials on their land for a fee that’s cheaper than hauling charges. Farmers typically have the right equipment to move materials to your desired location or transfer them to smaller vehicles, potentially offering a cost-effective solution.
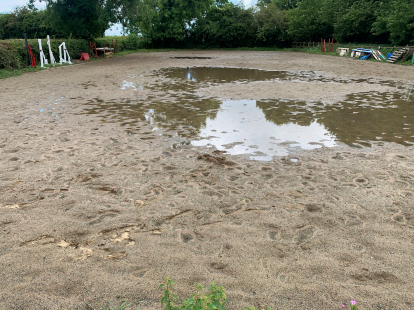
Choosing the Correct Place for Drainage
Drainage is a critical aspect of constructing a horse arena. Improper drainage can lead to significant problems. Before finalizing your location, confirm where the drainage system’s water will be discharged. Common choices include soakaway systems or simple ditches, but be mindful that regulations vary by region. Always consult your local authorities to ensure compliance.
Getting the Correct Levels
Excavation should be kept to a minimum whenever possible. The more uneven your site, the more excavation will be required. If extensive excavation is unavoidable, bear in mind the associated costs and the disposal of excess materials afterward. For sloped land, the cut-and-fill method is often used, where soil is moved from higher areas to flatten the lower ones. However, leveling steep slopes can be costly and difficult to mitigate.
Protecting Your Arena from the Elements
Horse arenas are prone to losing aggregates like silica sand, which can blow away in windy conditions. To prevent this, consider building your arena indoors or placing it near a hedgerow or surrounded by trees to serve as natural wind barriers.
Marking Out and Excavating Your Arena
Once you’ve selected the appropriate area based on the factors mentioned earlier, you can begin the excavation process. Always give yourself extra room by marking out an area slightly larger than your intended arena dimensions. Additionally, ensure there’s a meter of working space around the perimeter of the area to be excavated. For example, if your excavation area is 100m x 80m, aim for 102m x 82m to allow sufficient space for efficient work.
To mark the corners of the arena, place wooden posts at each corner. Use a string line between the posts and then spray the ground with marking spray to guide the digger operator. A quick way to verify the accuracy of your layout is to measure the diagonals—if they’re equal, your layout is correct.
Next, remove the topsoil to expose the subsoil. Subsoil is identified as the layer beneath the surface soil. Building directly on the initial soil isn’t advisable due to its low load-bearing capacity. Topsoil should be carefully removed and either reused or disposed of properly. Interestingly, topsoil can be sold in some cases, offsetting removal costs. Keep your soil in good condition, as it will simplify the final landscaping tasks.
Drainage Methods for Your Project
Once the land is excavated, it’s time to focus on the arena’s drainage system, which is vital for its longevity. Poor drainage can compromise even the highest-quality top layer. The most effective drainage method is the “Herringbone Drainage System,†which involves a 100-150mm underground pipe running centrally through the arena with 75-100mm perforated pipes branching at 45-degree angles toward the central pipe from the edges. These branches should be spaced five meters apart. The central pipe discharges into your chosen drainage outlet, such as a soakaway or ditch. Ensure the pipe depths align with the discharge point, and the trenches should remain moderately shallow.
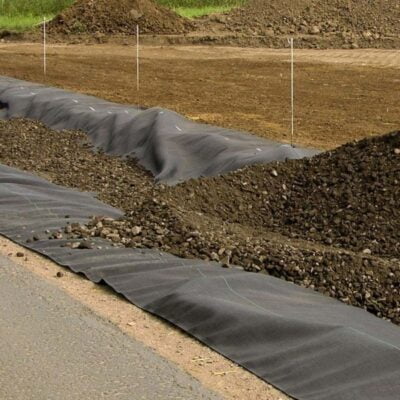
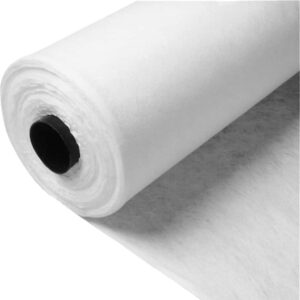
Using Woven Membrane for Equestrian Arenas
The next step in arena construction is laying the woven geotextile membrane as the bottom layer. The membrane should fully cover the entire area, providing stability to prevent mixing of materials above and below it. This helps avoid issues like pitting and puddling.
Install the membrane carefully, ensuring that all areas housing perforated pipework are adequately covered to maximize protection and system performance. For guidance on selecting the right membrane, check out our blog: "Horse Arena Membranes—Which One Should I Be Using?"
Following this, place the perforated drainage pipes in their channels and backfill them to the original excavation level using 20mm clean pea shingle. Backfilling refers to refilling cleared areas, and cleanliness ensures no blockages occur.
Sub Base and Fencing for Riding Arenas
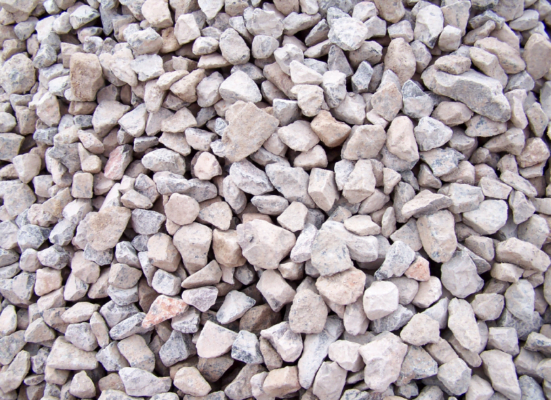
Once the site is leveled, it’s time to install the sub-base. Ideally, the sub-base should be six inches deep. Your choice of material depends on availability and cost. If possible, opt for crushed limestone, as it offers a pure sub-base superior to many recycled materials. Recycled materials can have impurities, though quality varies depending on the source. Regardless, crushed rock is usually the best option if available.
The sub-base serves to trap water during heavy rain, reducing pressure on the underlying drainage system. For optimal performance, the sub-base material should be 75-40mm in size. Larger materials hinder drainage, while smaller ones pass too much pressure to the drains. This process should involve a high-quality laser level and an excavator equipped with a roller for compaction.
For arena fencing, a three-bar post and rail system is recommended due to its proven effectiveness. The bars should connect to the inside of the posts to protect riders and horses from injury. Posts should be installed using a post knocker to reach the subsoil, and gravel boards should be attached to the bottom of the posts to shield them from wet soil and debris.
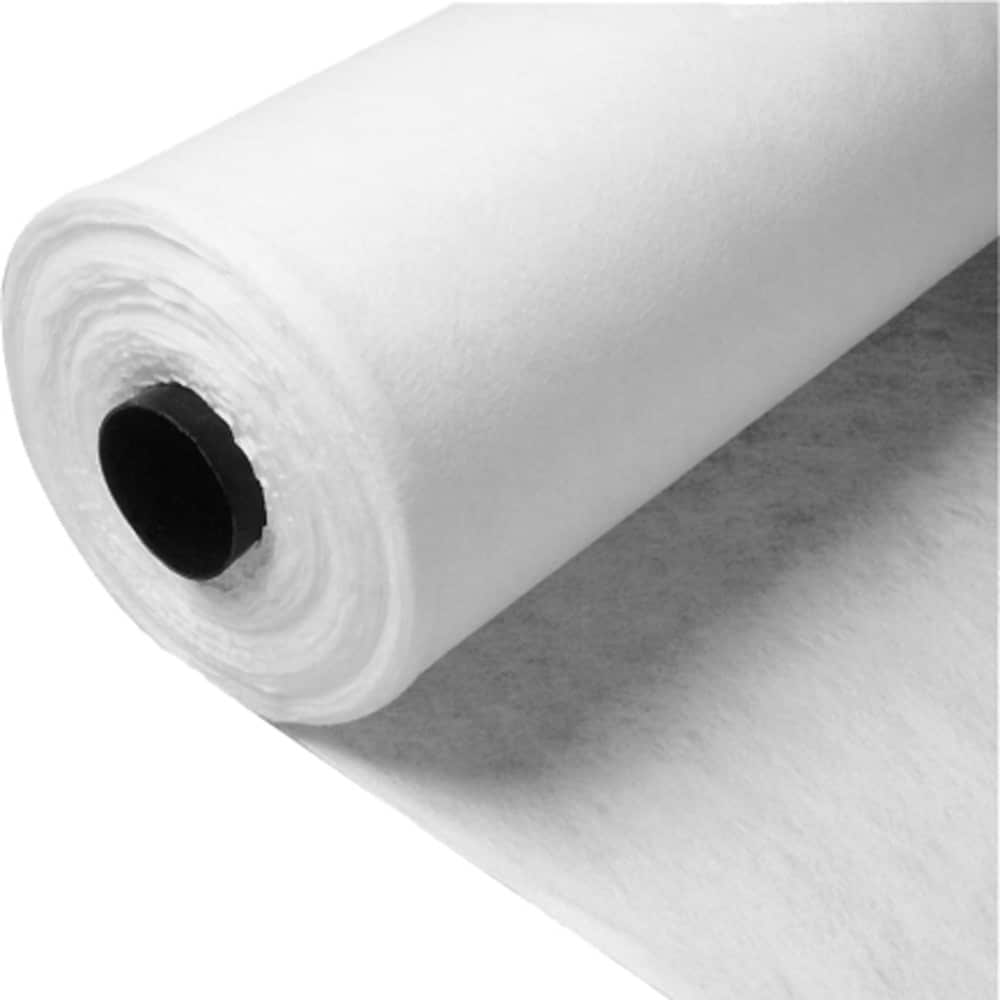
Using Non-Woven Membrane for Equestrian Arenas
Installing the upper membrane layer is critical. Use a non-woven geotextile membrane with a minimum weight of 300 GSM. Incorrect installation or a lighter membrane can lead to damage, allowing sand to escape and compromising the membrane’s purpose. Secure the membrane to the gravel boards, ensuring proper sealing of joints to prevent sand from seeping through and causing issues below. Also, remember to use the appropriate GSM for your arena type—refer to our other blog for more details: "Horse Arena Membranes Which One Should I Be Using?"
Non-woven membranes allow water to pass through into the drainage system below, unlike woven membranes, which are less efficient. Non-woven membranes also separate aggregates and prevent sand from mixing with the sub-layer, enhancing ground stability.
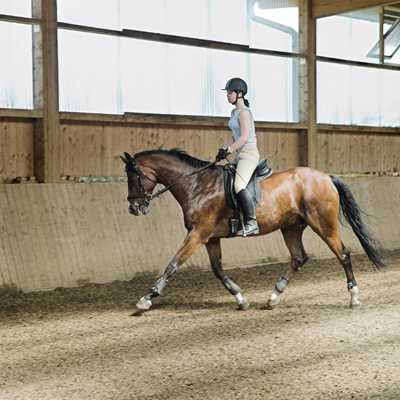
Choosing the Surface Layer
Silica sand is commonly used for the top layer, sometimes mixed with rubber chippings. The choice of aggregate depends on your budget after completing the main arena structure. The sand must be at least four inches deep, and during placement, no vehicles should travel over the geotextile membrane to avoid damaging it. Experts often create a temporary sand path for vehicle access. A roller and laser level should be used to ensure the sand layer is level, similar to the sub-base installation process.
Finally, add two inches of rubber chippings on top of the sand if desired. With this, your equestrian arena construction is complete, and you can enjoy countless hours of riding.
For any questions or uncertainties, feel free to reach out via email or phone—we’re here to help!
Shop Horse Arena Membranes:
Terram Rootguard Root Barrier
Tensar Geogrid TriAx
Terram Advantage 80 GSM Geo Textile Membrane – 4.5m x 100m
CNC Machined Components are mainly in six axle lathe with sticks of metal materials finished, such as variety of high precision and quality of electronic, computer precise components, communication components, automotive parts and accessories, machinery parts, sanitation hardware parts, optics precise parts, medical appliances, pneumatic tools accessories. We are very strict with our CNC machined components through the finished production is continuously improvement and growth, we will give you the best quality and services about our CNC machining products.
Cnc Machined Components,Custom Machining Part,Precision Cnc Components,Cnc Components
Stand Dragon Industrial Co., Ltd. , https://www.standdragontw.com